
Growing fresh herbs and vegetables year-round in your home without synthetic chemicals is straightforward when you build an organic indoor garden system using natural soil amendments, biological pest control, and sustainable materials. The method relies on three core principles: pesticide-free growing media, natural nutrient cycling, and integrated pest management, all of which can be set up in a weekend with minimal cost and maintained in about 15 minutes per day.
Australia’s climate extremes, from scorching summers to unpredictable rainfall, make indoor gardening increasingly practical for households wanting food security and genuine control over what ends up on their plates. An organic approach takes this further by eliminating the synthetic fertilisers and chemical pesticides found in conventional systems, creating a growing environment that’s safe for children, pets, and the beneficial insects that keep your plants healthy.
The difference between organic and conventional indoor systems comes down to inputs. Where commercial hydroponic setups often depend on manufactured nutrient solutions and chemical pest sprays, organic systems work with compost, worm castings, and companion planting to build soil biology that feeds plants naturally. This isn’t slower or less productive. When properly established, organic indoor gardens match or exceed conventional yields because healthy soil creates resilient plants that resist disease and produce more flavourful food.
Right now, Australian communities from Brisbane to Melbourne are turning spare rooms, balconies, and even closets into productive organic gardens that supply fresh greens, tomatoes, and herbs regardless of drought conditions or supermarket supply chains. The system you’re about to build connects you to that movement while giving you complete transparency about what nourishes your food from seed to harvest.
What You’ll Need to Get Started
You’ll need surprisingly few specialised items to launch your organic indoor garden, and most materials are available at Australian hardware stores, nurseries, or online sustainability retailers. Gathering everything beforehand prevents mid-project runs to the shop and lets you compare options for quality and environmental impact.
Growing Containers and Vessels
Start with food-grade containers that provide adequate drainage. Repurposed buckets (20-litre work well), timber planter boxes made from untreated pine, or terracotta pots suit most organic systems. Avoid containers that previously held chemicals or treated timber that may leach toxins. For apartments, consider fabric grow bags that collapse for storage and provide excellent aeration. Ensure each container has drainage holes or can be drilled without cracking.
Organic Growing Media
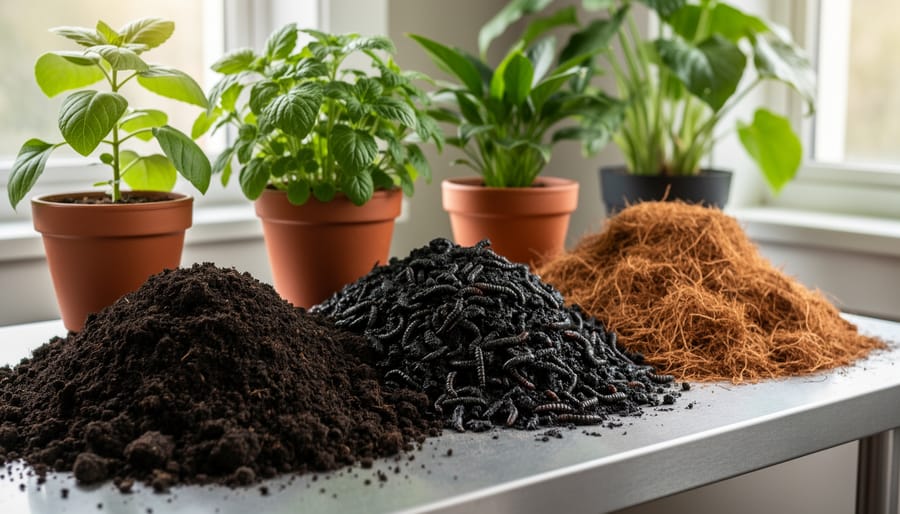
Your foundation requires coconut coir as a sustainable peat alternative, Australian-made worm castings for fertility, and well-aged compost, either homemade or from local composting facilities. Mix in perlite for aeration and consider adding biochar if available through Australian suppliers. A 50-litre bag of coir, 10 litres of worm castings, and 20 litres of compost will fill approximately three medium-sized containers.
Essential Materials Checklist
- Containers: 3-5 vessels with drainage (buckets, boxes, or fabric pots)
- Growing media: Coconut coir (50L), worm castings (10L), aged compost (20L), perlite (10L)
- Lighting: Full-spectrum LED grow lights rated for 240V Australian power, minimum 6000K colour temperature
- Natural nutrients: Seaweed extract, fish emulsion, and kelp meal from Australian coastal sources
- Watering: 10-litre watering can with fine rose attachment, or drip irrigation kit with 13mm fittings
- Basic tools: pH testing kit, hand trowel, pruning snips, measuring cups, timer switches
Lighting Equipment
Full-spectrum LED panels suited to Australian 240V power offer the best efficiency and lifespan. Budget $80-150 for quality units covering one square metre. Look for lights with adjustable hanging chains and built-in heat sinks. Bunnings and specialist hydroponics retailers stock appropriate models, though verify they’re suitable for soil-based organic systems rather than just hydroponic setups.
Natural Fertilisers and Amendments
Source liquid seaweed concentrate and fish emulsion from garden centres or coastal suppliers. Rock minerals like rock dust add trace elements, while crushed eggshells provide calcium. Keep neem oil on hand for organic pest management. Australian brands like Neutrog and Organic Crop Protectants offer certified organic options that support local manufacturing.
Safety and Space Considerations Before You Begin
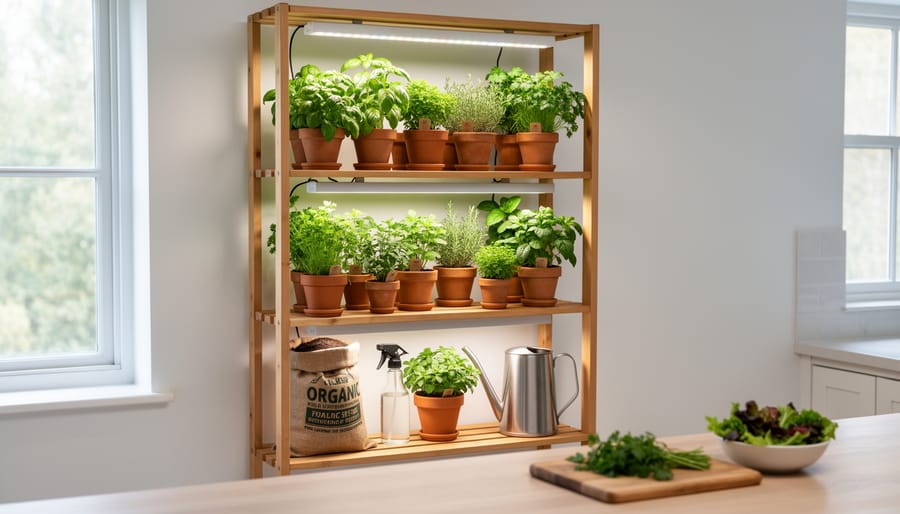
Before you break ground on your organic indoor garden, several safety and environmental factors need attention to protect both your household and your investment.
Water and electricity create dangerous combinations in indoor gardens. Position power boards and timers at least 60 centimetres above your highest container, and keep them away from watering zones. Check that your chosen location has adequate amperage for grow lights without overloading circuits, particularly in older Australian homes with limited power points per room.
Ventilation matters more than most beginners realise. Indoor gardens release moisture through plant transpiration, which can trigger mould growth in poorly ventilated spaces. In Queensland’s humid summers, you’ll need constant air circulation with fans or open windows, whereas Victorian winters might require dehumidifiers to manage condensation. Aim for gentle air movement that rustles leaves without creating cold drafts.
Weight becomes critical for apartment dwellers. A fully established system with containers, saturated growing media, and equipment can exceed 100 kilograms per square metre. Confirm your floor can handle the load, especially on upper levels or older buildings. Distribute weight across floor joists rather than concentrating everything in one spot, and consider placing heavy containers against load-bearing walls.
Organic doesn’t automatically mean safe around children and pets. Blood and bone, dynamic lifter, and even worm castings can attract curious animals or toddlers. Store amendments in sealed containers, and position your garden in rooms with controllable access. Many Australian natives are toxic if ingested, so research plant choices if you have pets who nibble greenery.
Choose locations with stable temperatures between 18-24°C, away from heating vents, air conditioners, and direct window sun that creates hot spots. A spare room, insulated garage corner, or dedicated cupboard often works better than kitchens or bathrooms where temperature and humidity fluctuate constantly.
Building Your System: Step-by-Step Process
Preparing Your Growing Space
Choose a location with stable temperatures between 15-25°C, avoid spots near heaters, air conditioners, or draughty windows that create fluctuations. A spare room corner, underused laundry nook, or sheltered garage section works well. Measure your available space to confirm containers and lighting equipment will fit comfortably with room for maintenance access.
Clear the area completely, then lay protective sheeting across the floor. Hardware stores stock heavy-duty plastic drop sheets, but recycled shower curtains or pond liner offcuts serve the same purpose. Extend coverage 30 cm beyond your planned garden footprint to catch spills and overflow. For wooden floors or carpet, add cardboard underneath the plastic for extra insurance against moisture damage.
Check power points are within two metres, extension leads create trip hazards and voltage drops that affect grow lights. Install a safety switch if your home lacks one; water and electricity demand respect. Test ventilation by leaving the door ajar or cracking a window; stagnant air invites mould. Apartments in humid climates like Brisbane may need a small desk fan positioned to create gentle air movement without directly blasting plants. Your space is ready when it’s clean, protected, powered, and breathing.
Setting Up Containers and Growing Media
Step 3: Arrange Your Containers for Light Distribution
Position your containers where each plant will receive adequate light without casting shadows on others. Taller plants go at the back or sides, shorter ones forward. Leave 5-10 cm between containers for air circulation, crowding invites mould and restricts growth. If you’re using a single grow light, cluster containers directly beneath it rather than spreading them out, since light intensity drops dramatically at the edges.
Step 4: Create Your Drainage Foundation
Place 3-5 cm of drainage material at the bottom of each container. Pebbles, broken terracotta pieces, or recycled ceramic work well. This prevents waterlogging, which kills roots faster than underwatering. If your containers lack drainage holes, drill several 6 mm holes in the base before adding drainage layers. For shallow containers (less than 15 cm deep), reduce drainage layer to 2 cm to preserve root space.
Step 5: Mix and Fill Your Organic Growing Medium
Combine three parts coconut coir with one part worm castings and one part composted sugarcane mulch in a large bucket. Add handfuls of native worm castings if available, they’re richer in Australian soil microbes. The mix should feel slightly damp and crumbly, not sodden. Fill containers to 2 cm below the rim, pressing gently to eliminate air pockets without compacting. This blend drains well while holding enough moisture for consistent root access to water and nutrients.
Installing Lighting and Watering Systems
Step 6: Position your grow lights 15-30cm above the growing mediumadjusting based on light intensity and plant type. LED panels suit most leafy greens and herbs at the upper range, while fruiting plants like tomatoes need closer positioning initially. Suspend lights with adjustable chains or hooks so you can raise them as plants grow. Angle multiple lights to eliminate shadows if you’re covering a larger area.
Step 7: Set timers to mimic natural day-night cycles. Most vegetables thrive on 12-16 hours of light daily. Leafy greens tolerate the lower end, while fruiting crops need closer to 14-16 hours. Use a basic mechanical or digital timer, available at hardware stores across Australia, plugged between your light and the wall socket. Consistent timing prevents stress and supports healthy growth rhythms.
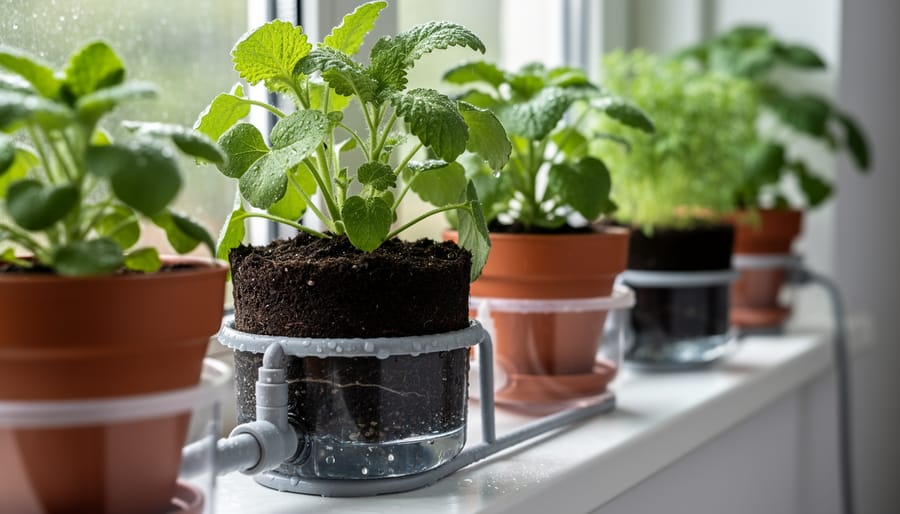
Step 8: Establish a watering system that conserves resources. Hand-watering works for small setups, check soil moisture by feeling 3cm below the surface before adding water. For efficiency, create a simple drip system using recycled drink bottles: punch small holes in the cap, fill with water, and invert into the soil. This slow-release method helps you use water efficiently while keeping roots consistently moist. If your household produces suitable greywater, you can reuse greywater from rinsing vegetables or washing dishes (avoiding detergents) to further reduce mains water consumption. Always water at the base rather than overhead to prevent fungal issues in humid indoor environments.
Introducing Beneficial Organisms and First Plants
Step 9: Inoculating Your Growing Medium
Before planting, introduce beneficial microbes that break down organic matter and protect roots. Mix a handful of quality worm castings into the top layer of your prepared growing medium, Australian-sourced castings often contain native microbe strains adapted to local conditions. Alternatively, brew compost tea by steeping mature compost in dechlorinated water for 24 hours, then water your containers with this microbial-rich liquid. These organisms establish the living soil ecosystem that defines organic growing.
For apartment growers concerned about odours, worm casting tea is virtually scentless once applied. The microbes colonise within days, creating a protective network around future roots. Skip this step and you’re just growing in inert media.
Step 10: Planting Your First Crops
Choose beginner-friendly plants that thrive indoors and suit your light setup. Leafy greens like rocket, spinach, and Asian greens tolerate lower light and grow quickly. Herbs such as basil, parsley, and coriander establish reliably from seed or seedling. Cherry tomatoes and dwarf capsicums need stronger lighting but reward patient growers.
Plant seeds at twice their depth, a 3mm seed goes 6mm deep. For seedlings, position the root ball level with the soil surface without burying the stem. Space plants according to their mature width: crowd lettuce 15cm apart, give basil 20cm, tomatoes need 30cm minimum.
Water gently after planting to settle roots without washing away seeds. Label everything with planting dates. Within a week, you’ll see germination or new growth signalling your organic system is alive and functioning.
Maintaining Organic Soil Health Naturally
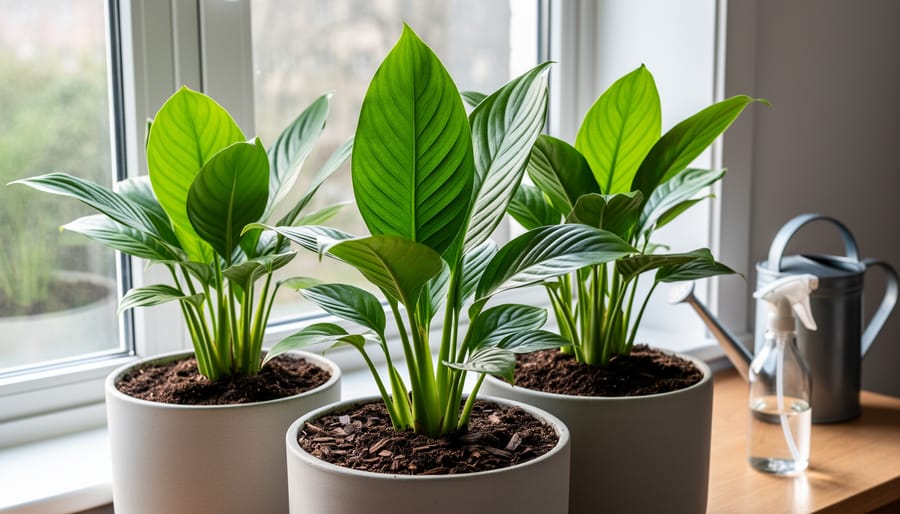
Your organic indoor system thrives when you close the nutrient loop rather than relying on purchased inputs. Start by composting your kitchen scraps directly in the system, bury vegetable peelings, coffee grounds and crushed eggshells about five centimeters deep around established plants, rotating spots each week. This feeds soil microbes immediately while reducing household waste by up to three kilograms per week for an average household.
A compact worm farm transforms this process into concentrated nutrition. Tumbleweed and Maze worm farms, widely available through Bunnings and independent garden centres, convert scraps into rich castings within eight to twelve weeks. Harvest a handful of castings monthly and scatter them across your growing medium’s surface, the worms’ digestive process makes nutrients immediately plant-available while introducing beneficial bacteria. Save the liquid that drains from worm farms (dilute it one part to ten parts water) for a nitrogen-rich feed every fortnight.
For faster results between compost cycles, use Australian-made organic liquid fertilisers like Neutrog’s Seamungus or OCP’s eco-seaweed. Apply at half the recommended outdoor strength since indoor plants grow in contained volumes, overfunding causes salt buildup that synthetic products would mask but organic systems reveal through leaf burn. Alternate between fish-based feeds (nitrogen-rich for leafy growth) and seaweed extracts (trace minerals and plant hormones) every two weeks.
Mulching retains moisture and feeds surface microbes simultaneously. Spread a thin layer of lucerne hay, pea straw or shredded autumn leaves across exposed soil, refreshing as it breaks down. This mirrors forest floor conditions where nutrients cycle continuously. If you notice depleted growth or pale leaves despite regular feeding, it’s time to fix your indoor garden by testing pH and adjusting your organic amendment ratios, overly acidic conditions lock out calcium and magnesium even when present.
This closed-loop approach embodies circular economy principles: your food waste becomes plant food, which becomes your food again, cutting landfill contributions while eliminating the environmental cost of manufacturing and transporting synthetic fertilisers.
Testing and Troubleshooting Your System
Once your organic indoor garden is established, regular monitoring helps you catch issues early and keep plants thriving. Start by checking soil moisture daily during the first two weeks, then transition to every second day as you learn your system’s patterns. Insert your finger about 5cm into the growing medium, it should feel like a wrung-out sponge, moist but not waterlogged. If water pools on the surface or the medium stays saturated beyond a few hours after watering, you’ve got drainage problems; add perlite or more coarse material to your next soil refresh. Conversely, if the top 3cm dries completely within hours, increase watering frequency or add a mulch layer to retain moisture.
Watch your plants closely for colour and growth signals. Healthy leaves should be vibrant green and firm, with new growth appearing within 7-10 days for fast-growing herbs and greens. Pale or yellowing leaves often indicate nitrogen deficiency, top-dress with worm castings or apply diluted liquid seaweed every fortnight. Dark green leaves with purple stems suggest phosphorus shortage, remedied with rock dust or composted manure tea. Twisted or curled growth might mean pH imbalance; organic systems typically settle between 6.0-7.0, which suits most edibles, but you can test with a simple kit from Bunnings and adjust with lime (to raise) or sulfur (to lower).
Light coverage deserves weekly assessment. Hold your hand at plant height, you should feel warmth but not burning heat from the lights. If lower leaves yellow and drop while top growth looks fine, those bottom sections aren’t receiving enough light; raise containers on upturned pots or add supplementary side lighting. Leggy, stretched stems mean plants are reaching for insufficient light, move fixtures closer or upgrade to higher-wattage LEDs.
How do I know if my plants are getting enough light?
Compact growth with short spaces between leaf nodes indicates adequate light. Tall, spindly stems reaching upward signal insufficient light, move your fixtures 10-15cm closer or extend daily light duration by 2-3 hours.
What does healthy organic soil look like?
Expect dark, crumbly texture with earthen smell and visible activity like tiny springtails or the occasional worm. White fuzzy growth on the surface is typically beneficial mycelium, not mould, it indicates thriving microbial life.
When should I see growth?
Seedlings emerge in 3-14 days depending on species, while transplanted starters show new leaf development within a week. Fruiting plants like tomatoes need 8-12 weeks from planting to first harvest.
For pest management without chemicals, inspect leaf undersides weekly for aphids, whitefly or spider mites. A strong spray of water dislodges most pests, while neem oil (available at Australian garden centres) handles persistent infestations, apply in the evening to avoid leaf burn. Introduce beneficial predators like ladybirds from specialist suppliers if problems recur.
Start harvesting leafy greens when they reach 10-15cm, taking outer leaves first so the plant continues producing. Herbs benefit from regular trimming, which encourages bushier growth. Most systems hit full productivity 4-6 weeks after planting, giving you continuous harvests throughout the year.
Scaling Up and Community Connections
Once your first organic indoor garden is thriving, you’ll naturally want to expand. Start by adding a second container with a crop that complements your current harvest, leafy greens pair well with herbs, while climbing tomatoes can share vertical space with trailing plants. This gradual approach lets you refine your techniques without overwhelming your space or routine.
Connecting with Australia’s urban farming community transforms indoor gardening from a solo project into a shared movement. Melbourne’s CERES Environment Park runs regular workshops on indoor organic systems, while Sydney’s community gardens often host seed swaps and composting collectives. Brisbane’s Northey Street City Farm offers mentorship programs pairing experienced growers with beginners, and Perth’s urban agriculture groups coordinate surplus sharing through neighbourhood networks.
These connections open practical opportunities:
- Join Seed Savers Network Australia to preserve heirloom varieties suited to organic indoor growing
- Register with REKO direct trade groups in Adelaide, Canberra and regional centres to share excess produce
- Participate in local permaculture guilds that offer free advice on indoor organic systems
- Connect through Australian City Farms and Community Gardens Network to find your nearest collective
- Access Food Connect’s grower networks across Queensland to swap knowledge and resources
Sharing your harvest builds neighbourhood resilience. A surplus of basil or cherry tomatoes becomes currency for conversation and connection. Many Australian apartment buildings now feature communal growing spaces where residents contribute plants and share maintenance, your indoor expertise translates directly to these collaborative environments.
Integrate your system into household sustainability by using greywater from your garden to water outdoor plants, composting all green waste back into your growing media, and saving seeds from your best performers. Each crop cycle deepens your understanding while reducing your environmental footprint. Your thriving indoor garden becomes evidence that sustainable food production works at any scale.
Building your organic indoor garden system isn’t just about growing food, it’s about reclaiming control over what you eat while treading lighter on the planet. You’ve now got the blueprint to create a thriving, chemical-free growing space that produces fresh vegetables and herbs regardless of what’s happening outside your window.
Start with a single container if that’s all you can manage. Grow three herbs in a sunny corner. The size matters far less than taking that first step toward self-sufficiency. As your confidence builds, so will your harvests.
Connect with others on this journey. Australia’s urban farming communities are welcoming spaces where beginners and experts swap cuttings, troubleshoot problems, and celebrate successes together. Your small indoor system contributes to a larger shift, thousands of households growing organically, reducing food miles, and proving sustainable living works in practice, not just theory.
Share what you learn. Post photos of your first harvest. Tell a neighbour how you composted that kitchen scrap into black gold. Every conversation plants seeds for broader change. Your organic indoor garden is more than a hobby, it’s your stake in Australia’s sustainable future, one harvest at a time.