
You can build a functional air conditioner without electricity in under an hour using ice, water, and basic household materials. The most effective method harnesses evaporative cooling through a simple clay pot design or a fan-free ice chest system that can drop ambient temperatures by 5-10 degrees Celsius, providing genuine relief during Australian heatwaves and power outages.
When summer temperatures soar across Australia and the grid fails or you’re living off-grid, conventional air conditioning becomes useless. But cooling doesn’t require electricity. For thousands of years, communities in hot climates have used passive cooling techniques that work with physics rather than power. These methods are experiencing a revival among sustainability-focused Australians who want resilience against blackouts, lower energy bills, and independence from fossil fuel-based cooling.
The science is straightforward: water absorbs heat as it evaporates, creating a cooling effect in the surrounding air. By directing airflow through or around moisture-laden surfaces, you create a temperature drop that can make indoor spaces genuinely comfortable. Combined with proper shading and strategic ventilation, these DIY systems offer practical relief without touching your electricity meter.
This guide walks you through three proven designs, from a 15-minute ice-and-bowl setup to a more permanent terracotta pot cooler. Each method uses materials readily available at Australian hardware stores like Bunnings, with total costs under 50 dollars. Whether you’re preparing for extreme weather events, reducing your environmental footprint, or simply seeking budget-friendly comfort, these electricity-free cooling solutions deliver measurable results you can build today.
Understanding Passive Cooling Principles
Passive cooling works by manipulating four fundamental physics principles that have kept humans comfortable for millennia. Understanding these mechanisms helps you choose the right approach for your specific Australian climate and maximise the cooling effect you can achieve without electricity.
Evaporative cooling relies on water absorbing heat energy as it transforms from liquid to vapour. When water evaporates, it pulls heat from surrounding air and surfaces, creating a noticeable temperature drop. This works exceptionally well in Australia’s dry inland regions, places like Alice Springs, Broken Hill, or Kalgoorlie, where low humidity allows rapid evaporation. In these areas, evaporative methods can reduce temperatures by 8-15°C. However, coastal cities like Sydney, Brisbane, or Darwin experience limited benefit during humid periods, as moisture-saturated air resists further evaporation.
Thermal mass cooling uses dense materials (water, clay, concrete, stone) to absorb heat during the day and release it slowly at night. Heavy materials resist temperature changes, creating a stabilising effect. You can leverage this by cooling thermal mass overnight when temperatures drop, then letting it absorb daytime heat. This principle works across all Australian climates but proves most valuable where diurnal temperature swings exceed 10-15°C, common in inland and southern regions.
Airflow management removes hot air and replaces it with cooler air through strategic ventilation. This doesn’t lower air temperature itself, but moving air accelerates evaporation from skin, creating a perceived cooling effect of 2-4°C. Cross-ventilation works in any Australian climate when outdoor air is cooler than indoor air, typically early morning and evening.
Radiant cooling blocks or redirects infrared heat before it warms your living space. The Australian sun delivers intense radiant energy, particularly through north and west-facing windows. Shade structures, reflective surfaces, and external barriers prevent this heat from ever entering, which is far more effective than trying to cool a space after it’s already heated. Every square metre of properly shaded window can prevent 300-500 watts of heat gain during peak summer, equivalent to running several electric heaters in reverse.
These principles work best when layered. A shaded home with good airflow and a clay pot cooler in a dry climate can achieve comfortable conditions even during 40°C days, while a humid coastal home might prioritise airflow and radiant barriers over evaporation.
Tools and Materials You’ll Need
You’ll need different materials depending on which cooling method suits your climate and living situation. The good news: most items are inexpensive and available locally across Australia.
For the Clay Pot Evaporative Cooler:
– Two unglazed terracotta pots in nesting sizes (25cm and 35cm diameter work well), available at Bunnings, local nurseries, or garden centres for $15-30 total
– Clean sand (5-10kg, builder’s sand from hardware stores or garden sand, around $5-10)
– Small cork or waterproof plug to seal the drainage hole
– Water in a spray bottle or jug for regular moistening
– Optional: shallow tray or plate to catch drips
For the Ice Thermal Sink Cooler:
– Styrofoam esky or insulated cooler box (any size from 10L upward, often found secondhand or around $10-40 new)
– Multiple freezer-safe containers or bottles (2L soft drink bottles work perfectly and cost nothing if reused)
– Small PVC pipe sections or cardboard tubes to direct airflow (optional, under $5 from hardware stores)
– Towels or absorbent cloths for condensation management
For Shade Structures and Ventilation Enhancement:
– Shade cloth (70-90% density recommended for Australian summers, $20-60 per metre from Bunnings or Clark Rubber)
– Hessian fabric or bamboo blinds for window coverings (rural suppliers, secondhand shops, or Spotlight, $15-50)
– Rope, cable ties, or UV-resistant cord for securing (around $10)
– Optional: timber battens or tension rods for mounting (prices vary, but offcuts from building projects work well)
Total budget ranges from $30 for a basic clay pot setup to around $150 for all three methods with new materials. Many households already have suitable containers, making the actual outlay much lower.
Safety Considerations and Climate Warnings
Before you begin your DIY cooling project, understand the real risks involved. Water-based cooling methods can introduce moisture problems if not managed properly, check your setup daily for standing water, ensure adequate drainage, and watch for musty smells or visible mould growth, especially in poorly ventilated spaces. Coastal Australians face higher humidity already, so evaporative methods may worsen indoor conditions rather than improve them. If you notice condensation pooling or persistent dampness, stop using that method immediately.
Structural safety matters for shade installations. Awnings and shade sails create significant wind load, particularly during storms or strong westerlies common across southern Australia. Secure all anchor points to load-bearing structures, not just weatherboards or trim. For renters, stick to temporary solutions like tension rods or removable brackets rather than drilling into exterior walls. In bushfire-prone areas (check your local Fire Danger Rating), avoid combustible shade materials near the home and maintain defensible space, fabric sails and dried vegetation can become ignition points during ember attack.
Know your limits. If you’re caring for elderly relatives, young children, or anyone with chronic health conditions, passive cooling alone may not suffice during heatwaves. The Bureau of Meteorology issues heatwave warnings for good reason, prolonged exposure to high temperatures is dangerous regardless of your cooling setup. Keep conventional backup options available, even if that means a small window unit for one room, and don’t hesitate to use community cooling resources during declared emergencies.
Method 1: Clay Pot Evaporative Cooler
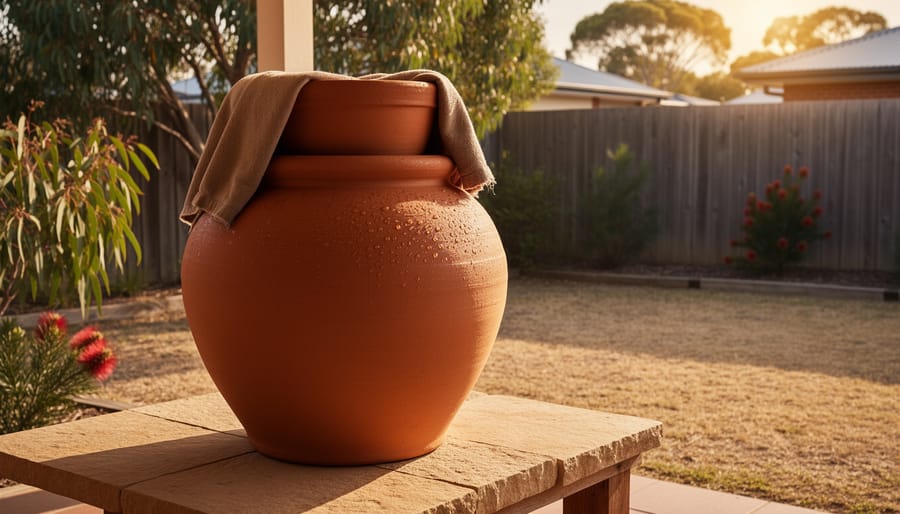
The zeer pot cooler is your simplest entry point into passive cooling. This ancient design relies on evaporation pulling heat from nested terracotta pots, and it works remarkably well in Australia’s drier inland regions.
Start by selecting two unglazed terracotta pots with drainage holes. The outer pot needs to be at least 5cm wider in diameter than the inner one. Common Australian sizes that work well: a 30cm outer pot paired with a 20cm inner pot. Check your local Bunnings or garden center for affordable options, usually $10-25 for the pair.
- Cover the drainage hole in the larger pot with a cork, small stone, or duct tape to prevent sand leakage (2 minutes).
- Pour a 3-5cm layer of clean sand into the bottom of the large pot, creating a level base (3 minutes).
- Center the smaller pot inside, ensuring equal spacing all around. The rims should sit at roughly the same height (2 minutes).
- Fill the gap between pots with sand, packing it gently but firmly. Stop about 2cm below the rim to prevent overflow (5-7 minutes).
- Saturate the sand completely with water until it won’t absorb more. You’ll need roughly 1-2 liters depending on pot size (3-4 minutes).
- Place a damp cloth over the top of the inner pot to maximize evaporative surface area (1 minute).
- Position your cooler in a shaded, well-ventilated spot where airflow can access all sides. Never in direct sun (2 minutes).
- Add water to the sand twice daily during hot weather, checking that it remains moist to touch (ongoing maintenance).
The inner pot creates a cooling chamber that typically drops 5-10°C below ambient temperature in Adelaide, Broken Hill, or Alice Springs. Coastal humidity reduces effectiveness significantly, often to just 2-3°C in Brisbane or Sydney summers.
Check the sand moisture daily by touching the surface between the pots. If it feels dry, add water immediately. If you notice white salt deposits forming on the outer pot, that’s normal mineral buildup from evaporation. If the cooling effect drops, the sand may have compacted or developed dry pockets. Remix it thoroughly and re-saturate. Store drinks, medications, or place the cooler near your workspace for localized relief during peak afternoon heat.
Method 2: Ice Thermal Sink with Fan-Free Airflow
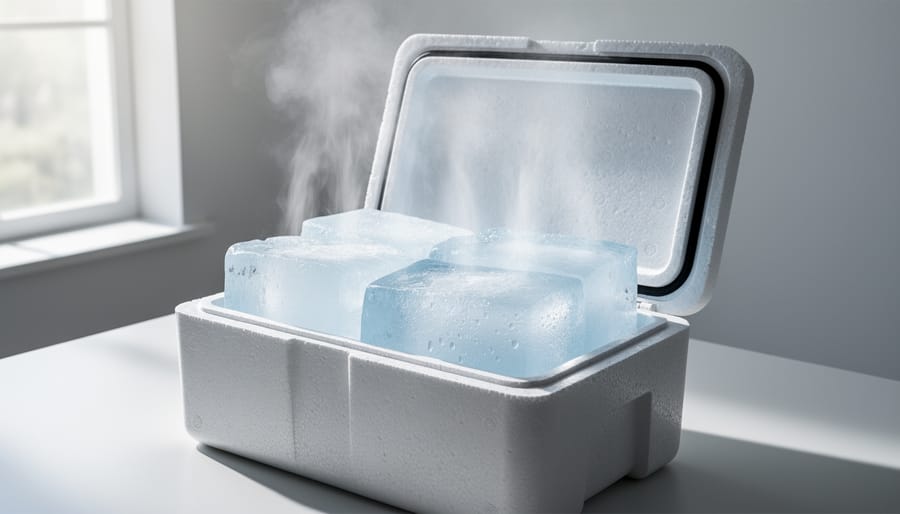
This method harnesses the cooling power of ice without requiring any electrical components. The principle is simple: cold air is denser than warm air, so it naturally sinks and flows outward when properly positioned. For Australian conditions where summer temperatures regularly exceed 35°C, you’ll need to prepare ice in advance and establish a reliable refresh cycle.
Ice Preparation and Container Selection
Freeze water in large plastic bottles (2-litre soft drink bottles work perfectly) or shallow containers that maximise surface area. Fill containers only 80% full to allow for expansion. A typical bedroom requires 4-6 frozen bottles for noticeable cooling. If you have freezer space, rotate two batches so fresh ice is always ready when the current batch melts. In coastal areas with higher humidity, expect ice to melt faster than in drier inland regions.
Your cooling vessel needs adequate drainage for condensation. Use a shallow metal or plastic tray lined with absorbent cloths, positioned on a stable surface at least 50cm above floor level. Place frozen bottles in the tray with air gaps between them.
Assembly and Positioning
- Position your elevated tray near a window or doorway where cooler exterior air can enter (works best after sunset when outdoor temperatures drop).
- Arrange frozen bottles in the tray with their broadest surfaces exposed to room air.
- Place absorbent towels beneath and between bottles to catch condensation, wring these out every few hours to prevent mould.
- Create a passive airflow path: cold air will sink from the ice level and flow toward floor areas, so ensure furniture doesn’t block this movement.
- For multi-storey homes, position coolers on upper levels where heat accumulates; cold air will descend naturally.
Combine this with DIY patio shade to reduce incoming heat during peak hours. Replace ice twice daily during extreme heat, once mid-morning and again late afternoon, to maintain consistent cooling through the hottest periods.
Method 3: Enhanced Shade Structures and Natural Ventilation
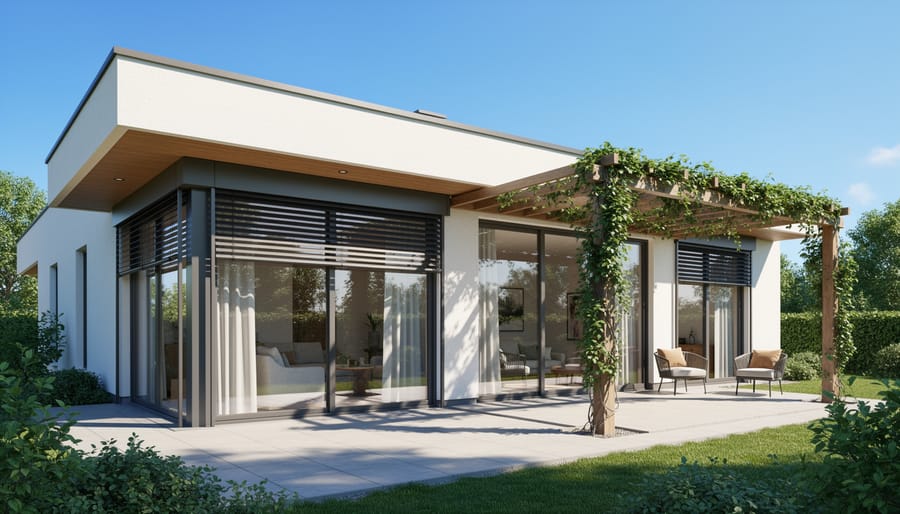
Shade structures and strategic airflow work together to block heat before it reaches your living spaces, making them the most powerful passive cooling method for Australian conditions. Unlike evaporative or ice-based systems that cool existing air, shade and ventilation prevent the heat problem from starting.
Target your north and west-facing windows first, these cop the most intense afternoon sun in Australia. External shading beats internal blinds every time because it stops heat before it penetrates the glass. A dark curtain drawn inside still absorbs solar radiation and re-radiates it into your room, while an external awning or shade sail blocks up to 90% of heat gain before it touches your windows.
For renters and those wanting quick wins, tension-mounted bamboo or reed screens provide immediate relief without drilling. Hang them 15-20cm away from windows to create an air gap that vents rising heat. Shade cloth attached to existing eaves with removable hooks offers similar protection and survives strong winds better than rigid panels. Both solutions remove cleanly when you move.
Permanent structures deliver better long-term performance:
- External roller blinds (effectiveness: high), adjustable, retractable, ideal for western windows
- Fixed awnings or verandahs (effectiveness: very high), best heat reduction, require structural mounting
- Shade sails (effectiveness: high), cover large areas, need anchor points, removable for storm seasons
- Pergolas with deciduous vines (effectiveness: moderate to high), living shade blocks summer sun, allows winter warmth
- Louvred screens (effectiveness: high), adjustable airflow control, doubles as privacy barrier
Cross-ventilation multiplies your shade structure’s effectiveness. Open windows on opposite sides of your home during cooler morning and evening hours, creating a through-breeze that flushes accumulated heat. Position one opening low (where cool air enters) and another high on the opposite wall (where hot air escapes). This thermal stack effect works without fans.
Plant living shade walls using fast-growing natives like bower vine or hardenbergia. Train them up wire frames 30cm from north-facing walls. The vegetation creates a double barrier: leaves block direct sun while the air gap between plant and wall vents rising heat. Water them with greywater to keep the whole system sustainable.
Maximizing Effectiveness: Combining Methods
The real power of passive cooling emerges when you combine methods rather than relying on a single approach. Think of your home as having cooling layers that work together throughout the day.
Start by establishing your shade barrier early. Deploy awnings and shade sails before 9am to prevent heat from entering in the first place. This foundation makes every other cooling method more effective, you’re working with less accumulated heat.
Layer your evaporative clay pot cooler in the shadiest, most lived-in room during peak afternoon heat (typically 2-5pm in most Australian regions). Position it where natural airflow passes by, carrying cooled air through the space. Meanwhile, activate your ice thermal sink in bedrooms an hour before you’ll use them, allowing cooled air to settle and displace warm air upwards.
Prioritize rooms strategically. Focus cooling efforts on one or two spaces, usually a living area for daytime and a bedroom for sleep, rather than attempting to cool your entire home. Close doors to uncooled rooms to contain the effect.
Once outdoor temperatures drop below indoor levels (usually after sunset), practice thermal purging: open windows on opposite sides of your home to flush accumulated heat. This cross-ventilation resets your space for the next day’s passive cooling cycle.
This layered approach can help Australian households save on energy bills while maintaining comfort. Track indoor versus outdoor temperatures with a simple thermometer to fine-tune your timing and method combinations for your specific climate zone.
Testing and Verifying Your Cooling Setup
Once your cooling setup is running, you’ll want to confirm it’s actually working. Start by placing a basic thermometer at head height in the middle of your cooling zone and another in an adjacent uncooled room as a control. Take readings at the same time each day, ideally during peak afternoon heat (2-4 PM). A second cheap thermometer costs under $10 at Bunnings or Kmart and makes comparison straightforward.
In dry inland areas like western Sydney or Adelaide’s suburbs, a clay pot evaporative cooler can drop temperatures 6-10°C below ambient. Coastal humid zones (Brisbane, Darwin) will see smaller drops of 2-4°C because evaporation slows when air is already moisture-laden. Ice thermal sinks typically provide 3-5°C cooling for 2-4 hours, while enhanced shade structures prevent 4-8°C of heat gain compared to unshaded windows, especially crucial on north and west-facing walls.
Key performance checks:
- Temperature difference between cooled and control spaces should be measurable within 30 minutes
- Clay pot coolers should stay damp to touch; dry sand means insufficient watering
- Ice setups should show condensation but no pooling water
- Shade structures should eliminate direct sun on windows during peak hours
- Humidity shouldn’t exceed 65% indoors (use a $15 hygrometer to monitor)
If cooling feels inadequate, first seal window gaps and door drafts that let hot air infiltrate. Check that your evaporative cooler isn’t in direct sunlight (which reduces efficiency) and that ice containers have proper airflow around them. Excessive humidity or musty smells signal poor ventilation, open windows on opposite sides of your home after sunset to purge moisture. When passive methods can’t maintain safe indoor temperatures below 32°C, supplement with community cooling centres or consider whether your setup needs structural improvements like better insulation or additional shade layers.
Community Approaches and Next Steps
You don’t have to tackle passive cooling alone. Across Australia, community groups are pooling knowledge and resources to beat the heat without electricity. Repair cafés in cities like Melbourne and Brisbane now run summer workshops where neighbours build zeer pots together, sharing terracotta suppliers and troubleshooting techniques specific to local humidity. Neighbourhood tool libraries stock everything from shade sail grommets to thermal mass materials, letting you test approaches before committing to purchases.
Sustainability groups on Facebook and community forums have become hubs for Australians posting temperature logs, design tweaks, and climate-specific adaptations. Someone in Broken Hill shares their ice cooler rotation schedule; a Perth renter documents portable shade screens that survived a landlord inspection. This collective learning accelerates what works in real Australian conditions.
Ready to go further? Consider larger thermal mass projects like installing water walls or earth-bermed garden beds against north-facing walls. Whole-home passive retrofits, adding eaves, strategic window films, or rooftop evaporative gardens, deliver compounding benefits when combined with your DIY coolers. Some communities are even creating shared cooling gardens with dense canopy trees and misting zones, open during heatwaves.
Document your setup with photos and temperature readings, then share them. Your clay pot placement or awning angle might solve someone else’s cooling puzzle. Connect these experiments to broader water-saving and energy projects, greywater systems feed evaporative coolers beautifully, and every degree you passively cool is grid demand you’ve eliminated. Start conversations, not just constructions.
Electricity-free cooling isn’t just possible, it’s becoming essential for Australian households facing rising temperatures and energy costs. You’ve now got three proven methods at your disposal: the clay pot evaporative cooler for dry climates, the ice thermal sink for targeted relief, and enhanced shade structures that stop heat before it enters your home. Each approach works differently depending on your local conditions, so experimentation is key.
Start with whichever method suits your budget and climate best. Measure the temperature drop, note what works, then expand your setup. Combining shade structures with evaporative cooling during peak summer can deliver surprising comfort without touching the grid. These small changes add up, every degree you cool passively reduces electricity demand and builds genuine climate resilience.
Consider pairing your cooling efforts with home energy assessments to identify other efficiency gains, and explore how broader upgrades can slash energy bills year-round. Your cooler home starts with one simple step today.
Frequently Asked Questions
How much cooler will my room actually get?
Clay pot evaporative coolers typically drop temperatures by 5-10°C in dry inland climates, while ice thermal sinks can reduce room temperature by 3-7°C depending on ice volume and room size. In humid coastal areas, expect more modest drops of 2-4°C, but increased airflow will still improve comfort levels significantly.
Do these methods work in humid climates like coastal Queensland?
Evaporative methods are less effective in high humidity, but shade structures and ice thermal sinks still provide meaningful relief. Focus on maximizing airflow and blocking radiant heat with awnings and reflective coverings, which work regardless of humidity levels.
Can I use these solutions if I’m renting?
Absolutely. Clay pot coolers and ice thermal sinks are completely portable and leave no permanent modifications. For shade structures, tension-rod curtains, removable window films, and freestanding shade sails don’t require landlord approval and can move with you.
What’s the total cost to get started?
A basic clay pot cooler costs $15-30 for pots and sand. Ice thermal sinks use materials you likely have already (bottles, containers) or can source for under $20. Simple shade improvements like reflective window film run $10-40 per window, while basic shade sails start around $50-80.
Are there any health or safety risks I should know about?
Watch for mould growth in evaporative coolers by changing water every 2-3 days and ensuring good ventilation. Keep ice containers elevated to prevent water pooling, and monitor for condensation that could damage floors or furnishings. Always maintain awareness of heat stress symptoms and have a backup plan for extreme heat days.
How do energy savings compare to running a conventional air conditioner?
These passive methods use zero electricity beyond occasional freezer use for ice blocks (negligible compared to AC runtime). A typical air conditioner draws 2-3 kW and can cost $3-8 per day during Australian summer, while passive cooling essentially runs free after initial setup costs.
The questions above reflect what readers typically struggle with when considering non-electric cooling: whether it’s worth the effort, how to adapt to their specific situation, and what realistic outcomes they can expect. One concern that comes up frequently is whether combining methods creates complications. The answer is no, layering shade structures with evaporative or ice cooling actually amplifies effectiveness without adding complexity, since each method targets a different aspect of heat management.
Another practical question centres on time investment. Building a clay pot cooler takes 20-30 minutes, preparing ice thermal sinks requires just 10 minutes of active time (plus freezing), and installing removable shade can be done in an afternoon. Maintenance is minimal: water refills every few days, ice replacement once or twice daily during peak heat, and occasional cleaning. The effort-to-benefit ratio makes these approaches accessible even for people with limited time or DIY experience.