Measure your window frames and cut clear acrylic sheets or rigid plastic film to size, leaving a 5mm gap around all edges for proper compression fit. Purchase your materials from Bunnings or Mitre 10—look for 3mm polycarbonate sheets for durability or shrink-film kits for budget-conscious renters who need removable solutions. Install magnetic strips or removable mounting tape around the window frame’s interior edge, then attach your cut plastic panels to create an insulating air gap between the existing window and your new interior storm layer.
This straightforward approach to interior storm windows can slash your heating and cooling costs by up to 30% while dramatically reducing drafts, condensation, and outside noise. For Australian households facing increasingly extreme weather events and rising energy prices, DIY interior storm windows represent one of the most cost-effective eco-friendly home improvements you can tackle in a single weekend.
Unlike permanent exterior storm windows requiring professional installation, interior versions suit renters and homeowners alike. You’ll need no specialized tools beyond a measuring tape, utility knife, and straight edge. The materials cost between $15-45 per standard window depending on your chosen design, delivering payback through reduced energy bills within a single winter season.
The beauty of this project lies in its adaptability. Whether you’re weatherproofing a drafty Queenslander in Brisbane, insulating against Melbourne’s unpredictable cold snaps, or creating a thermal barrier for Sydney’s westerly summer heat, interior storm windows work across Australia’s diverse climate zones. The removable nature means you can install them during peak heating or cooling seasons and store them away when mild weather returns.
Your existing windows don’t need replacement—you’re simply adding a protective thermal layer that traps insulating air while maintaining natural light and your home’s aesthetic appeal.
Why Interior Storm Windows Matter in Australian Homes
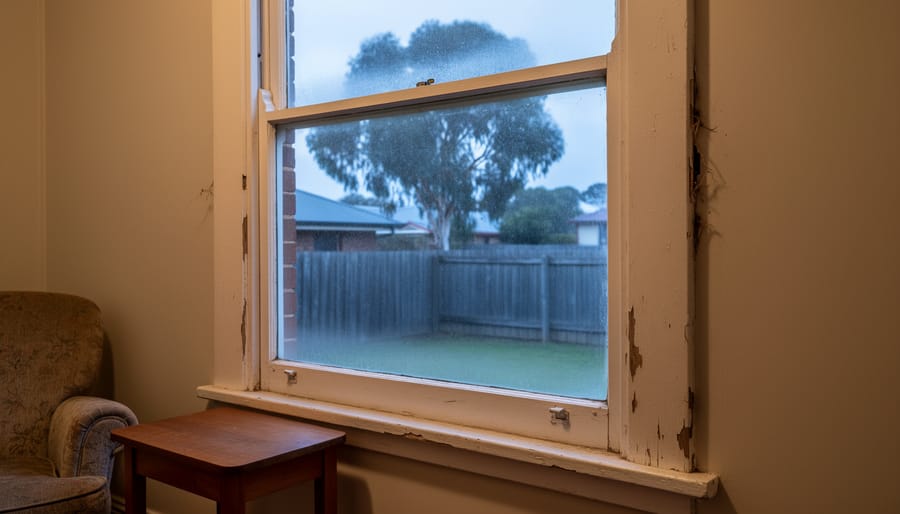
Here’s the reality many Australian homeowners don’t realise: your windows are silently draining energy and money. In fact, poorly performing windows can account for up to 40% of heating energy lost from your home during winter. That’s nearly half your heating bill disappearing through the glass.
The science is straightforward. Single-pane windows, common in older Australian homes built before modern building codes, create a thermal bridge between your comfortable interior and the cold outdoors. Heat naturally moves from warm to cold, and without a proper barrier, it escapes right through the glass. Interior storm windows work by creating an insulating air gap between the existing window and the additional interior layer, dramatically reducing this heat transfer.
This matters differently across our diverse climate zones. In Tasmania and the Victorian highlands, where winter temperatures regularly drop below 10°C, the heating savings are substantial. Melbourne and Sydney residents face milder but still significant winter heat loss, particularly during those damp, chilly months. Even Brisbane and Perth homeowners benefit during cooler periods and gain year-round comfort by reducing drafts.
Australian housing stock presents unique challenges. Many homes built between the 1950s and 1990s feature aluminium-framed single-glazed windows, which are particularly poor thermal performers. Heritage homes often have beautiful but inefficient timber-framed windows. For renters, permanent modifications aren’t possible, making removable interior storm windows an ideal solution.
Starting with a home energy assessment helps identify your worst-performing windows, but even without formal testing, you likely know which rooms feel coldest. That’s where interior storm windows make the biggest difference, creating immediate comfort improvements while building towards a more sustainable, energy-efficient home. Our community of DIY enthusiasts across Australia has proven this approach works, regardless of your rental status or renovation budget.
Understanding Air Sealing Before Installing Storm Windows
Quick Air Sealing Fixes for Window Frames
Before you tackle your DIY storm windows, take time to address the existing gaps around your frames—it’s the foundation of an effective thermal barrier. Even the best storm window won’t perform well if cold air streams through cracks and gaps in the original frame. The good news? Sealing window gaps is one of the quickest wins for improving your home’s comfort and energy efficiency.
Start by running your hand around the window frame on a windy day to identify air leaks. For movable sashes, adhesive-backed foam weatherstripping from Bunnings (around $8-12 per roll) creates an immediate seal. V-strip or tension seal weatherstripping works brilliantly for timber frames and lasts several years. For stationary gaps between the frame and wall, reach for Selleys No More Gaps or similar acrylic gap fillers available at both Bunnings and Mitre 10—choose paintable options if you’re particular about aesthetics.
Larger gaps exceeding 5mm benefit from low-expansion foam sealant. Apply it carefully as it expands, and trim excess once cured. For renters or those wanting reversible solutions, removable rope caulk works wonders during colder months and peels away cleanly when temperatures rise.
This preparatory work typically takes just an hour or two per window but can reduce air infiltration by up to 30 percent. You’re not just saving energy—you’re creating a more comfortable home while taking meaningful climate action right where you live.
Choosing Your Interior Storm Window Design
When it comes to insulating your windows against Australia’s temperature extremes, you’ve got more options than you might think. The beauty of DIY interior storm windows is that there’s a solution for everyone, whether you’re renting in Melbourne’s inner suburbs or own a weatherboard home in Tasmania.
Let’s explore the range that suits different circumstances. Plastic film kits represent the most budget-friendly entry point. These shrink-to-fit sheets attach to your window frame with double-sided tape and tighten with a hairdryer. They’re wonderfully suited for renters who need something temporary and damage-free, though they typically last just one season. Many Australians in the ACT and southern states swear by them for winter months.
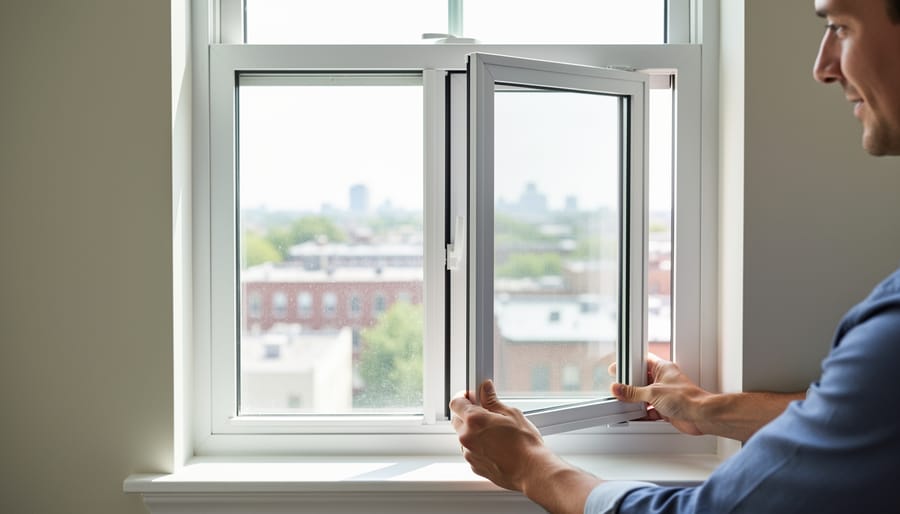
Stepping up in permanence, magnetic frame systems have gained popularity in Australian homes recently. These clever designs use thin acrylic or polycarbonate panels held in place by magnetic strips attached to your window frame. They’re removable when you want fresh air during those glorious spring days, yet substantial enough to provide excellent insulation throughout winter.
| Design Type | Cost Range (AUD) | Skill Level | Best Use Case |
|---|---|---|---|
| Plastic Film | $15-40 per window | Beginner | Renters, seasonal use |
| Magnetic Frames | $60-120 per window | Intermediate | Removable year-round solution |
| Hinged Panels | $80-150 per window | Intermediate-Advanced | Homeowners wanting ventilation flexibility |
| Fixed Acrylic | $50-100 per window | Intermediate | Permanent installation, maximum efficiency |
For those comfortable with basic carpentry, hinged wooden frames fitted with acrylic offer versatility. These swing open when needed but seal tightly when closed, perfect for rooms where you want control over ventilation. Fixed acrylic panels provide the most robust insulation and work brilliantly for windows you rarely open, like those in laundries or spare rooms.
Consider your climate zone too. If you’re battling Darwin’s humidity, removable options make sense. In Hobart’s colder months, more permanent installations deliver better returns on your effort and investment.
Materials and Tools You’ll Need
Building your own interior storm windows is refreshingly achievable with materials that won’t strain your budget or the planet. The beauty of this project lies in its flexibility—you can source nearly everything sustainably while supporting local Australian businesses and community initiatives.
For the window frame, you’ll need either timber or aluminium strips. Bunnings and Mitre 10 stock sustainable plantation timber like pine or Tasmanian oak, perfect for creating sturdy frames. Alternatively, check local salvage yards like Reverse Garbage in Sydney or The Bower Reuse and Repair Centre—they often have reclaimed timber at fraction of retail prices. For those preferring lightweight options, recycled aluminium strips work brilliantly and resist warping in humid climates.
The glazing material forms the heart of your storm window. Polycarbonate sheeting offers excellent insulation and durability, available at most hardware stores. For a truly eco-conscious choice, consider acrylic sheets made from recycled materials, increasingly available through specialty suppliers. Some renovators have great success with repurposed glass from old picture frames or windows—browse Gumtree or Facebook Marketplace in your area.
You’ll need weatherstripping or draught excluder tape to seal gaps, readily available at Bunnings. Choose silicone-based options over synthetic alternatives when possible. For assembly, opt for water-based wood glue and stainless steel screws, both more environmentally friendly than chemical-heavy alternatives.
Additional tools include a tape measure, handsaw or drop saw, drill with appropriate bits, and sandpaper. Many community tool libraries across Australian cities offer equipment borrowing—a wonderful way to reduce consumption while connecting with neighbours.
Finally, grab corner brackets for reinforcement and magnetic tape or velcro strips for easy installation and removal—particularly important for renters needing reversible solutions. Total costs typically range from 30 to 80 dollars per window when sourcing thoughtfully.

Step-by-Step: Building a Magnetic Frame Interior Storm Window
Measuring and Cutting Your Frame
Getting your measurements spot-on is crucial for effective DIY storm windows, especially if you’re renting and need to avoid any permanent changes to your property. Here’s how our community of sustainable home improvers across Australia tackle this essential step.
Start by measuring the window recess width at three points: top, middle, and bottom. Timber frames often shift over time, particularly in older Australian homes, so these measurements might differ slightly. Record the smallest measurement and subtract 3-4mm to allow for easy installation and removal. Repeat this process for the height, measuring left, centre, and right.
For cutting your frame materials, whether you’re using timber or acrylic, measure twice and cut once, as the saying goes. A handsaw works fine for smaller projects, but a mitre box ensures those crisp 45-degree corner angles that’ll make your frame look professional. If you’re working with corflute or polycarbonate sheeting for the glazing panel, score along your measured line with a utility knife, then snap cleanly along a straight edge.
The beauty of this approach? Everything remains completely reversible. Come summer, simply remove your storm windows and store them flat until next winter, leaving no trace on your rental property while you’ve enjoyed lower energy bills throughout the cooler months.
Installing the Glazing and Magnetic System
Now comes the satisfying part where your DIY storm windows take shape. Start by cutting your acrylic or polycarbonate glazing to size, leaving a 3mm gap around all edges to allow for expansion in warmer months—essential for Australian climates where temperature swings can be significant. Use a fine-toothed saw and keep the protective film on until installation to prevent scratches.
For the magnetic system, you’ll need self-adhesive magnetic strip tape, readily available from Bunnings or specialist suppliers. Cut strips to fit along all four edges of your frame’s interior face. Clean both surfaces thoroughly with methylated spirits before applying. Press the magnetic side firmly onto the frame, then attach the corresponding steel tape to your glazing’s edges. This creates a satisfying seal that you can pop off easily for cleaning or summer storage.
Test the magnetic hold before completing all windows—you want firm contact without gaps. If your window receives direct afternoon sun, consider using slightly stronger magnets to prevent warping-related separation. Many Australians find this removable system perfect for rental properties, as it leaves no permanent marks. Store your panels flat in a cool, dry space during warmer months when you don’t need that extra insulation layer.
Alternative Approach: Heat-Shrink Film Storm Windows for Renters
If you’re renting or simply want to test the storm window concept before investing in a more permanent solution, heat-shrink film offers an incredibly accessible entry point. Many Australian renters have discovered this approach transforms their draughty windows each winter without risking their bond or requiring landlord approval.
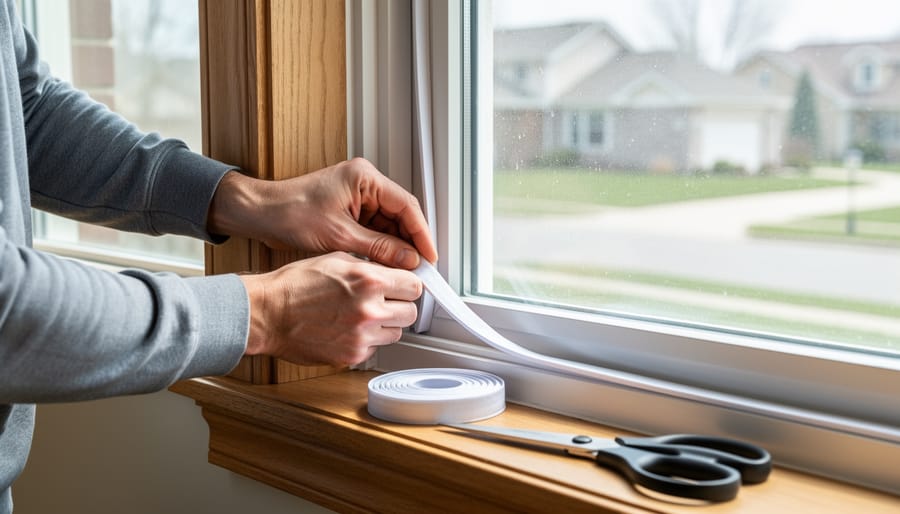
The beauty of heat-shrink window film lies in its simplicity. Available at most hardware stores across Australia (Bunnings stocks several options starting around $15-25 per window kit), this transparent plastic film adheres to your window frame using double-sided tape. Once positioned, you gently apply heat from a hairdryer, and the film tightens to create a smooth, nearly invisible barrier that traps an insulating layer of air between the film and your glass.
Application takes roughly 15-20 minutes per window. Start by thoroughly cleaning your window frame where the tape will adhere—any dust or moisture will compromise the seal. Cut the film generously, leaving several centimeters of overlap on all sides. Press the double-sided tape firmly around the frame’s interior edge, peel off the backing, then carefully smooth the film onto the tape, working from top to bottom. The magic happens when you apply heat: wrinkles vanish as the film contracts, leaving a taut, clear surface.
While not as robust as acrylic or rigid plastic inserts, heat-shrink film typically lasts one heating season (roughly April through September in most Australian climates). You’ll remove it come spring, making it perfect for rental properties. Community members report energy savings of 10-15% during winter months, and the reduced condensation alone makes it worthwhile. It’s an encouraging first step toward year-round comfort and lower energy bills.
Testing and Optimizing Your Storm Window Performance
Once you’ve installed your interior storm windows, it’s time to ensure they’re delivering the comfort and energy savings you’re after. Testing your handiwork isn’t complicated, and making a few simple adjustments can dramatically improve performance.
Start with the smoke test, a remarkably effective way to detect air leakage. On a windy day, light an incense stick or candle and slowly move it around the edges of your storm window. Watch the smoke carefully. If it wavers or gets drawn toward gaps, you’ve found an air leak that needs sealing. This simple method has helped countless Aussie DIYers identify problem spots that might otherwise go unnoticed.
For condensation management, observe your windows during temperature extremes. A small amount of condensation between the existing window and storm insert is normal, but excessive moisture pooling suggests inadequate ventilation. If you notice this, try adjusting your seal tightness or adding small weep holes at the bottom to allow moisture escape.
Temperature testing provides tangible proof of success. Use an infrared thermometer or even your smartphone with a thermal camera app to measure surface temperatures before and after installation. Many Australian households report interior glass surface improvements of 3-5 degrees Celsius, which translates directly to reduced heating and cooling costs.
Common troubleshooting includes tightening loose magnetic strips, adjusting compression seals that are too tight or loose, and realigning frames that don’t sit flush. If you’re experiencing rattling, add foam weatherstripping to contact points. Persistent fogging between panes often indicates inadequate spacing—aim for at least 12mm air gap for optimal insulation.
Remember, your DIY storm windows are part of your broader sustainability journey. Share your results with neighbours and local community groups. These collective efforts create real change across Australian communities, one window at a time.
The Environmental and Financial Payoff
Installing DIY interior storm windows delivers tangible environmental and financial rewards that extend far beyond your household budget. When Australian homes reduce their heating and cooling demands, the collective impact ripples through our energy grid and atmosphere.
A typical Australian home with single-pane windows can lose up to 40 percent of its heating and cooling energy through these vulnerable points. By installing interior storm windows, you’re creating an insulating barrier that can reduce this heat transfer by 50 to 70 percent. For a modest three-bedroom home in Melbourne or Sydney running reverse-cycle air conditioning, this translates to preventing approximately 1.2 to 2 tonnes of CO2 emissions annually—equivalent to taking a small car off the road for three months each year.
The financial mathematics are equally compelling. Based on current Australian electricity prices averaging 30 to 40 cents per kilowatt-hour across major cities, reducing your heating and cooling energy consumption by even 25 percent translates to annual savings between $200 and $400 for average households. Your initial investment of $150 to $300 in materials for a DIY installation typically achieves payback within the first year, with continued savings compounding annually.
When entire neighbourhoods embrace these efficiency measures, the benefits multiply. Reduced peak demand helps stabilise our electricity grid during extreme weather events, potentially lowering costs for everyone. Communities in Canberra and Tasmania have already demonstrated how collective action in reducing energy bills through simple retrofits creates momentum for broader sustainable change. Your window project becomes part of Australia’s larger journey toward energy resilience and carbon reduction, proving that practical home improvements can deliver meaningful environmental impact while protecting your household finances.
You’ve just discovered how accessible and impactful DIY interior storm windows can be for your Australian home. This project isn’t just about saving a few dollars on heating bills—it’s about taking meaningful control of your environmental footprint and joining a growing movement toward energy independence. Start with one or two windows this season to build your confidence and see immediate results. As winter approaches across southern Australia, there’s no better time to begin.
Your success story matters. Share your experience with neighbours, local sustainability groups, or online communities focused on eco-friendly living. These conversations spark collective action and help others overcome the initial hesitation many feel about home improvements. Remember, DIY storm windows complement other smart home energy solutions you might explore later, creating a comprehensive approach to sustainable living. Whether you’re renting or own your home, you’ve proven that small, practical steps create real change. This empowering first project opens the door to greater energy efficiency and demonstrates that environmental responsibility begins right where you live.