
Building a DIY solar exhaust fan takes about 4-6 hours and costs between $150-$300 in materials, but it can dramatically reduce indoor temperatures and slash cooling costs for Australian homeowners. You’ll mount a small solar panel to power a DC fan that pulls hot, stale air from your roof space or room, creating natural airflow without adding a cent to your electricity bill. The system works brilliantly in our sun-drenched climate because the hotter it gets, the harder your fan runs, exactly when you need it most.
Across Australian suburbs, more households are embracing this affordable ventilation solution as part of a broader passive cooling strategy. Unlike commercial solar attic fans that can cost upwards of $600 installed, the DIY approach gives you full control over sizing, placement, and upgrades. The beauty lies in its simplicity: no mains wiring, no electrician required for basic installations, and no ongoing running costs.
This project suits confident beginners willing to work safely on a roof or through a wall. You’ll need basic hand tools, a drill, and careful attention to weatherproofing, but the payoff is substantial. Many DIY builders report roof space temperature drops of 10-15 degrees Celsius on scorching summer days, translating to cooler living spaces below and reduced strain on air conditioning systems.
Whether you’re ventilating a stifling garage, workshop, shed, or your home’s roof cavity, a solar exhaust fan transforms oppressive heat into comfortable, breathable air while treading lightly on the planet. Let’s walk through exactly how to build one that works.
Why Solar Exhaust Fans Work for Australian Homes
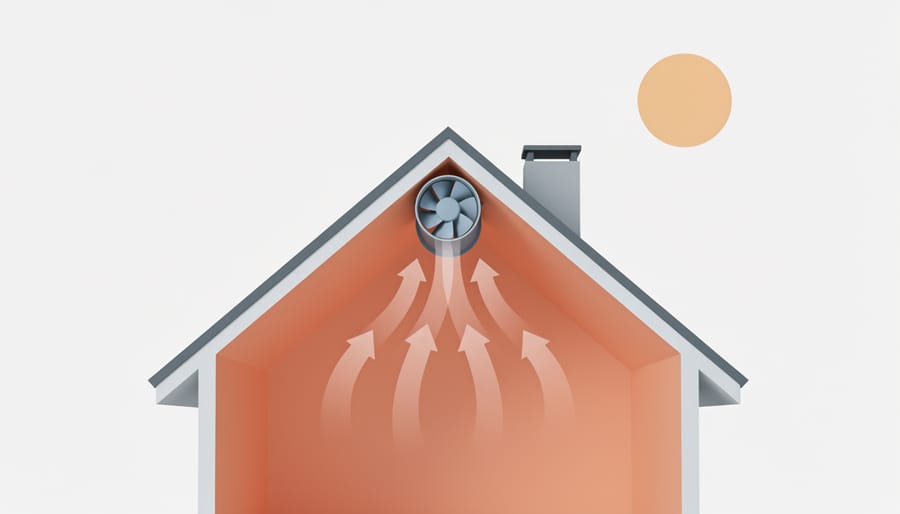
Australia’s scorching summers create a heat trap in roof spaces, with temperatures regularly exceeding 60°C in uninsulated attics. A solar exhaust fan attacks this problem at its source by extracting superheated air before it radiates down into your living areas. Unlike conventional ventilation that draws power from the grid, these systems harness the sun’s energy exactly when you need it most, during peak heat hours when your cooling demand spikes.
The physics is straightforward: hot air rises and accumulates in your roof cavity, turning the space into a massive heat reservoir that slowly cooks your home from above. By actively venting this trapped heat, you prevent thermal transfer through ceilings and reduce the load on your air conditioning system. Studies show properly installed exhaust ventilation can lower roof space temperatures by 15-20°C, which translates directly to cooler rooms and reducing cooling and energy bills by up to 30% during summer months.
Solar-powered ventilation shines in Australia’s varied climate zones. In northern tropical regions, year-round heat makes these systems valuable daily. Southern homeowners benefit most during extended summer periods and heatwaves. The technology complements passive cooling strategies you may already use: awnings and external shading reduce heat entering through windows, while the exhaust fan tackles heat that accumulates in your roof structure itself.
The environmental math is compelling. A typical household air conditioner draws 2-3 kilowatts during operation; reducing its runtime by even a few hours daily cuts hundreds of kilograms of emissions annually. When paired with home energy assessments that identify other efficiency opportunities, a solar exhaust fan becomes part of a coordinated approach to sustainable living that saves money while shrinking your carbon footprint.
Tools and Materials You’ll Need
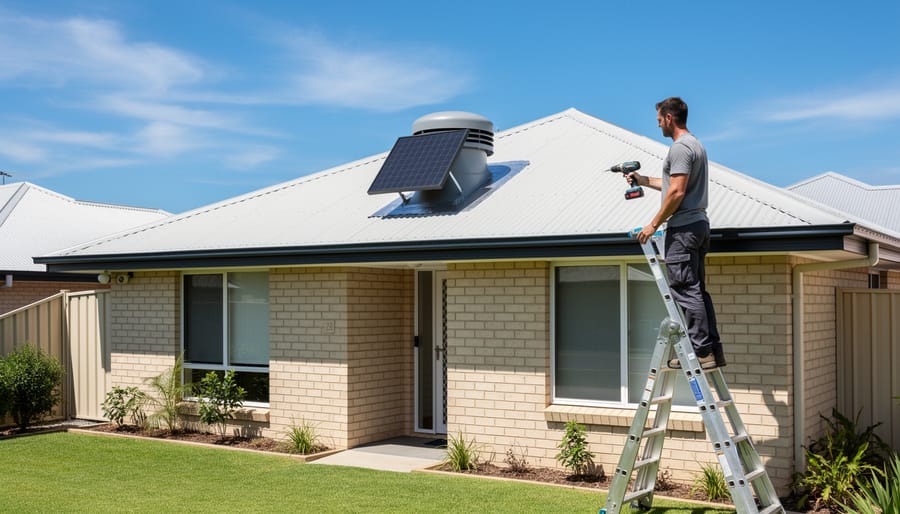
Gathering the right tools and materials before you start will save time and frustration. Most items are available from Bunnings, Jaycar Electronics, solar specialists like Solar Online, or local roofing suppliers across Australia. Budget around $250-$450 for a complete DIY setup in 2026, depending on panel size and whether you include battery backup.
Tools Required:
- Electric drill with metal and wood bits
- Jigsaw or reciprocating saw for cutting roof openings
- Measuring tape and marker
- Safety harness and roof ladder
- Wire strippers and crimping tool
- Screwdrivers (Phillips and flathead)
- Silicone gun for sealant application
- Tin snips for flashing work
Essential Materials:
- 10-20W solar panel (monocrystalline recommended for Australian heat, around $50-$90)
- 12V DC brushless fan motor rated 15-25cm diameter ($40-$80 from Jaycar or electronics suppliers)
- PWM or MPPT charge controller to regulate power ($25-$60)
- Roof flashing kit compatible with your roofing material ($30-$50)
- MC4 solar connectors and 4mm² cable rated for outdoor use
- Stainless steel mounting brackets and screws (critical for coastal areas)
- Sikaflex or equivalent exterior-grade polyurethane sealant
- 12V inline fuse holder with 5A fuse for safety
Optional Components:
- 12V sealed lead-acid or lithium battery (7-12Ah) for evening operation ($60-$120)
- Programmable timer switch for automated control
- Insect screen mesh to prevent entry
- Temperature-activated switch for automated operation
Choose a fan with metal blades rather than plastic for longevity in harsh Australian sun. The solar panel should handle temperatures up to 60°C, common on Australian roofs during summer. If your roof has existing penetrations for plumbing or other vents, you might reuse some flashing components. For Colorbond roofs, get colour-matched flashing to maintain your home’s appearance and avoid voiding warranties.
Safety First: Important Precautions
Before you climb onto your roof with tools in hand, understanding the safety requirements for this project isn’t just good practice, it’s essential for protecting yourself and ensuring your installation meets Australian legal standards.
Working at heights presents the most immediate danger. Use a properly secured ladder rated for your weight plus tools, work only in dry conditions with non-slip footwear, and consider hiring roof safety harness equipment from hardware stores like Bunnings or Kennards Hire. If your roof pitch exceeds 25 degrees or you’re uncomfortable with heights, hiring a professional is the safer choice.
Electrical safety requires particular attention with solar panels, which generate voltage whenever exposed to light. Never work on solar connections in direct sunlight, cover panels completely with opaque material during installation, and verify all circuits are isolated before handling wiring. While you can legally assemble components, connection to household circuits or grid-tied systems requires a licensed electrician under Australian law.
Homes built before 1990 may contain asbestos in roofing, eaves, or insulation. If you suspect asbestos presence, stop work immediately and arrange professional testing. Disturbing asbestos materials without proper licensing carries heavy penalties and serious health risks.
Heat safety matters during Australian summers. Work early morning or late afternoon to avoid peak temperatures, stay hydrated, wear sun protection, and never work alone. Having someone nearby who can call for help if you experience heat stress or a fall could save your life.
Finally, contact your home insurer before starting. Some policies require notification of roof modifications, and documenting your work with photos and compliance certificates protects your coverage if issues arise later.
Step-by-Step: Building Your Solar Exhaust Fan
Choosing the Right Location
The most effective solar exhaust fan placement targets your home’s main heat collection points while maximizing solar panel exposure. Start by walking through your home during the hottest part of the day, typically between 2pm and 4pm, and identify which rooms feel warmest. Heat naturally rises to ceiling level, so upstairs bedrooms, spaces directly under dark roof sections, and rooms with west-facing walls often become the biggest hot spots.
For optimal solar charging in Australia, position the fan where the solar panel can face north with minimal shading from trees, neighboring buildings, or other roof structures. The panel needs direct sunlight during peak heat hours to power the fan when you need it most. Check sun angles throughout summer: what seems sunny in winter might be shaded when the sun sits higher in December through February.
Roof pitch matters for both installation ease and water drainage. Fans install most simply on gentle slopes between 15 and 30 degrees, and steeper pitches require additional mounting brackets and weatherproofing care. Avoid valleys where water collects, and position the unit at least one meter from roof edges.
Consider how existing passive cooling features work with your fan. If you’ve installed awnings or external shading on north or west walls, place the exhaust fan to pull hot air from the opposite side of the house, creating cross-ventilation that draws cooler shaded air through living spaces.
Cutting and Preparing the Opening
Before you cut anything, lay drop sheets over furniture and floors directly below the work area to protect against dust and debris. Mark your opening dimensions from inside the roof cavity, adding an extra 10mm on each side for the fan’s mounting flange. Drive a nail through each corner to create visible reference points on the exterior.
For Colorbond or metal roofing, use tin snips or an angle grinder with a cutting disc, working slowly to avoid deforming the metal. Start your cut from a corner and follow your marked lines carefully. With concrete or terracotta tiles, you’ll need to remove whole tiles first, lift them gently with a flat pry bar, working from the bottom up to avoid cracking. Cut the sarking underneath with a sharp utility knife.
Once you’ve made your opening, check the roof cavity for dust or insulation that fell during cutting. Vacuum thoroughly before proceeding. Inspect the cut edges, metal edges should be filed smooth to prevent injury and future rust. For tile roofs, you may need to trim surrounding tiles with a diamond blade to achieve the right fit.
Test-fit your fan housing before moving forward. The flange should sit flat against the roof surface with no gaps larger than 3mm, which you’ll seal in the next step.
Installing the Fan and Weatherproofing
Mount the fan unit squarely over your prepared opening, ensuring the base sits flush against the roof surface. Most solar exhaust fans come with pre-drilled mounting holes, use these as guides, but don’t overtighten screws into Colorbond or tile roofs, as you’ll crack the material or create stress points that leak later.
Flashing is where most DIY installations fail in Australian conditions. Your flashing needs to extend at least 150mm up the roof slope from the fan base and tuck under the roofing material above. For tile roofs, carefully lift tiles two rows up from the opening and slide the flashing underneath, overlapping shingles like fish scales so water runs over joints, never under them. On Colorbond, use purpose-made metal flashing that matches your roof profile, sealed with polyurethane sealant rated for Australian UV exposure and temperature extremes.
Apply a continuous bead of high-grade silicone around the fan base before setting it down. Focus extra sealant where the mounting flange meets the roof, as this joint takes the most water pressure during heavy rain. Check that water will shed away from all sides of the unit.
For coastal areas or cyclone-prone regions, add mechanical fasteners beyond the standard screws. Small L-brackets secured into roof battens provide backup during severe weather. Seal every screw hole individually before driving fasteners, exposed screw threads are water highways straight into your ceiling.
Connecting the Solar Panel and Wiring
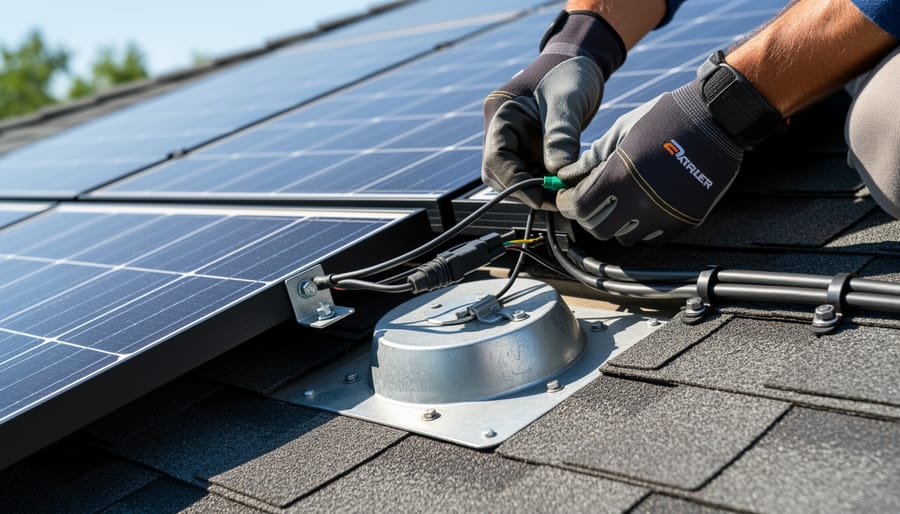
Connect the solar panel to the fan motor starting with the controller unit, which regulates voltage and prevents overcharging if you’re adding battery backup. Most DIY solar exhaust fans use a simple 12V or 24V DC system, match your panel’s output to your fan’s requirements. Strip wire ends carefully, use waterproof MC4 connectors for the panel-to-controller connection, and secure all joins with heat-shrink tubing rather than electrical tape, which degrades quickly under Australian UV exposure.
Position your solar panel facing true north (not magnetic north) at an angle roughly matching your latitude for year-round efficiency. In Brisbane that’s about 27 degrees, Melbourne around 38 degrees. Most DIY setups mount the panel flat on the roof for simplicity, accepting a slight efficiency trade-off. Secure it with stainless steel brackets and use silicone sealant rated for metal roofing, cheap sealants crack within months under our harsh sun.
Run wiring through conduit, never exposed. Drill entry points with a slight downward angle so water can’t track inside. If you’re adding battery backup for evening operation, use a deep-cycle marine battery housed in a ventilated box. Connect positive to positive, negative to negative, double-checking polarity before powering up, reversed connections will damage the controller instantly.
Test the system in full sun before sealing everything permanently. The fan should spin immediately when sunlight hits the panel, with no flickering or hesitation.
Testing and Verifying Your Installation
Once your solar exhaust fan is installed, proper testing ensures it performs as intended and protects your home from weather damage. Start your verification on a clear, sunny day when the solar panel receives full exposure, ideally between 10am and 2pm when Australian sun intensity peaks.
Walk through this essential verification checklist to confirm everything works properly:
- Test fan activation in direct sunlight: the motor should start spinning within seconds of the panel receiving strong light
- Check airflow direction by holding tissue paper near the fan opening to confirm air exhausts outward, not inward
- Inspect all seals and flashing while the fan runs, looking for gaps or loose mounting hardware
- Measure before and after temperatures in the space below using a thermometer over a two-hour period on a hot day
- Verify no leaks after the first decent rain by checking the ceiling and roof cavity near the installation
For meaningful temperature reduction data, monitor the attic or roof space temperature with and without the fan operating on similar weather days. You should see a drop of 5-15 degrees Celsius in well-sealed spaces, though results vary based on roof insulation, colour, and size. If temperatures barely change, check that the fan draws air from the hottest collection point and exhausts to open air rather than into another enclosed space.
Common issues include fans that stop in partial shade, normal behaviour, though adding a small battery backup solves this. If the fan runs but airflow feels weak, ensure nothing blocks the intake or exhaust, and verify the panel wattage matches the motor requirements. Rattling noises typically indicate loose mounting bolts that need tightening. After heavy storms, recheck all weatherproofing seals, as thermal expansion and contraction can occasionally shift flashing over the first few months. Strong, consistent airflow combined with measurably cooler interior temperatures confirms your system works effectively.
Next Steps: Maximizing Your Passive Cooling System
Your solar exhaust fan works best as part of a coordinated cooling strategy rather than in isolation. Pair it with external shading like DIY patio shade structures or awnings on north and west-facing windows to stop heat before it enters your home. The fan then exhausts the smaller heat load much more effectively, creating a noticeable temperature difference throughout your living spaces.
Check your fan’s performance monthly during summer. Clean the solar panel surface, remove debris from fan blades, and inspect seals around the roof penetration before the wet season arrives. In cooler months, consider adding a simple switch to turn the fan off when you don’t need ventilation, extending the motor’s lifespan.
Track your electricity bills to quantify savings. Most Australian households running a solar exhaust fan alongside improved shading report 15-30% reductions in cooling costs during peak summer months. Document your setup with photos and share results with local sustainability groups or online forums. Your real-world data helps others in similar climates make informed decisions.
Ready to expand? Adding a second fan in problematic hot spots like garages or upper-floor bedrooms multiplies the benefits. You’ve already mastered the skills, and bulk-buying materials reduces costs for additional units.
Your DIY solar exhaust fan is more than just a single project, it’s a practical step toward a cooler, more sustainable home that works with Australia’s climate rather than fighting against it. By harnessing free solar energy to extract hot air, you’ve created a system that costs nothing to run while reducing the load on your air conditioner during those scorching summer months.
The real power comes from combining this ventilation system with other passive cooling strategies you’ve explored or are planning. Pair your solar fan with strategic shading, quality awnings, and proper insulation to create a comprehensive approach that can slash your energy bills and shrink your carbon footprint.
We’d love to hear how your project turned out. Share your experience, challenges, and results with fellow Australians in sustainable living communities online, your insights might inspire someone else to take the leap. Every solar exhaust fan installed is another household reducing grid dependence and showing that meaningful environmental action starts right at home. You’ve built something that makes a difference, one cooler room at a time.
Common Questions About DIY Solar Exhaust Fans
Do I need council approval to install a DIY solar exhaust fan?
In most Australian councils, a small solar exhaust fan mounted on your roof typically falls under exempt or compliant development, meaning you won’t need formal approval. However, requirements vary between states and local government areas. If you’re in a heritage conservation area, have a heritage-listed home, or plan to modify load-bearing structures, you’ll likely need approval. Units installed on existing roof penetrations or replacing old whirlybirds generally face fewer restrictions. Check your local council’s planning portal or call their building department before starting work. Some councils require notification even when approval isn’t mandatory, particularly if you’re working near property boundaries or in bushfire-prone areas.
How much can I realistically save on cooling costs?
Savings depend on your home’s size, insulation quality, and how you currently cool your space. Most Australian households running a solar exhaust fan alongside other passive cooling strategies report 20-30% reductions in air conditioning use during shoulder seasons (September-November and March-May). In a typical Queensland home, that translates to $150-300 saved annually on electricity bills at 2026 rates. The system works hardest when you need it most, as solar output peaks during hot afternoons when heat buildup is greatest. Your payback period for a DIY installation typically ranges from 18 months to three years, compared to five to seven years for commercial units.
Will the fan work effectively in different Australian climate zones?
Solar exhaust fans perform well across Australia but with varying benefits. In Darwin and Cairns, year-round heat makes them consistently valuable for moisture control and temperature reduction. Melbourne and Adelaide see the best results during summer months, with reduced effectiveness in winter when heat retention becomes more important. Perth’s hot, dry summers make solar ventilation particularly effective when paired with evaporative cooling or shaded outdoor areas. Tasmania and alpine regions benefit most in summer but should include manual shutoffs or dampers to prevent heat loss during cold months. The key is matching your fan capacity to local temperature ranges and humidity levels.
Can I connect the fan to my existing rooftop solar system?
While technically possible, most DIY builders keep the exhaust fan on a separate solar panel for simplicity and safety. Connecting to your grid-tied solar system requires a licensed electrician and additional equipment to isolate the DC circuit, which often costs more than a standalone panel.
How long will a DIY solar exhaust fan last?
Quality solar panels typically last 20-25 years, while brushless DC fan motors run for 10-15 years with minimal maintenance. The weatherproofing and flashing may need attention every 5-7 years depending on your local conditions and roof material.
Should I run the fan during winter?
In most Australian climates, you’ll want to close dampers or disconnect the fan during winter to retain indoor heat. Some builders install manual shutters or programmable controllers that reduce operation when outdoor temperatures drop below 18°C, preventing unnecessary heat loss.
Will this interfere with my existing roof vents or whirlybirds?
A solar exhaust fan actually works well alongside passive vents and whirlybirds, creating a more effective ventilation system overall. The powered fan drives airflow while passive vents provide additional intake or exhaust points, improving whole-house air circulation.
What maintenance does the system require?
Solar exhaust fans need relatively little ongoing attention. Clean the solar panel surface every three to four months to maintain efficiency, particularly after dust storms or in coastal areas where salt spray accumulates. Inspect the fan blades and motor housing annually for debris, nesting materials, or wear. Check weatherproofing seals each year before storm season, and verify that flashing remains secure after high winds. Lubricate the motor bearing annually if your unit has a brushed motor (brushless motors need no lubrication). Most Australian owners spend about two hours yearly on maintenance, typically scheduling inspections before summer when the system works hardest.